Here is a cool music file that works well on the latest versions of SW. (Are your systems up to date?)
This one is great for school applications used in conjunction with our
Scheduled Alerts feature: PBX Setup / Services / Scheduled Calling (all the way at the bottom).
NOTE: This feature requires a license.
| First download the file to your PC. (Remember where you put it on your PC) (I don't know where you put it.) |
Download file: |
| Now load the file to the IPitomy PBX. 1. Open your web browser and access the PBX 2. Go to PBX Setup / Edit Prompts 3. Click the Browse... button aaaaaaaaaaaaaaaaaaaaaaaaaaaaaaaaaaaaaaaaaaa |
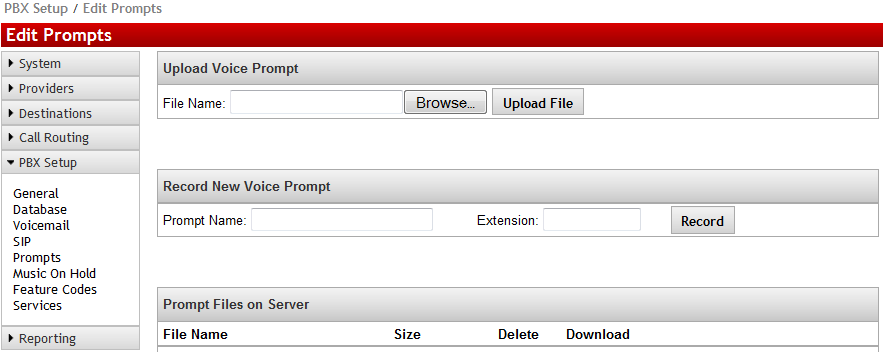 |
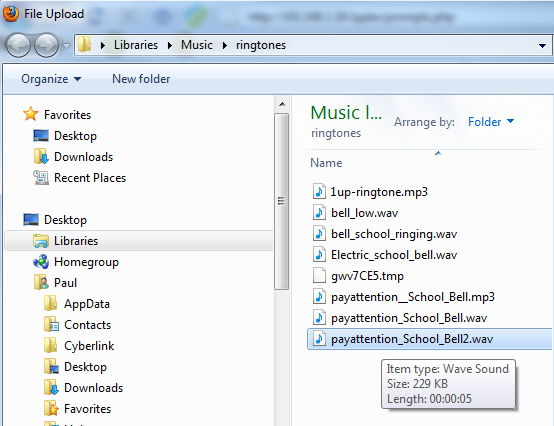
| Your PC's file search window will open and you must go the place where the file that you just downloaded is located... I put mine in /Libraries/Music/ringtones Find it and double click it or highlight it and then click Open ...whatever you usually do. You will now be back at the Edit Prompts window (above)... Click Upload File You now have the file loaded onto the IP PBX |
 |
| Don't forget the Save Changes button! |
|
| Now Go to Destinations/Menus/Edit Menu and make a menu that will be used to combine the file that you just uploaded with a Multicast Page "Zone". You must assign a number to this menu since that is how it will be addressed in the schedule function. |
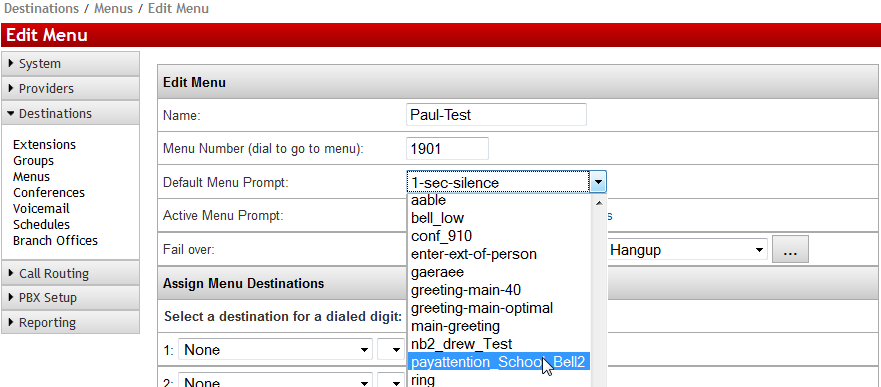 |
| Don't forget the Save Changes button! | |
| Now Go to Destinations / Ring Groups ... Multicast Paging Groups Either click Add Group or select from those existing. |
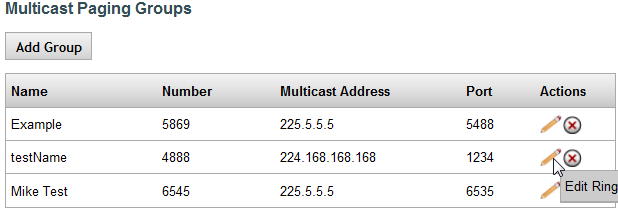 |
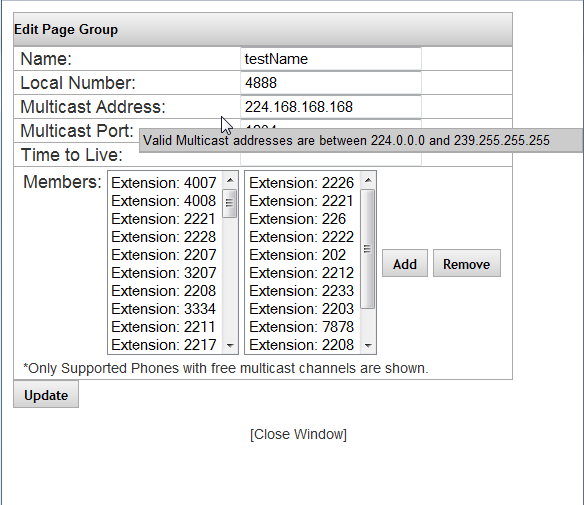
| Pick a name for a new group and assign a Multicast page Address... following the rules (must be between 224.0.0.0 and 239.255.255.255) Now select the extensions that should be part of this Multicast Page Group and Click Add. Click Update Click Close Window |
 |
| Now Go to PBX Setup / Services / Scheduled Calling (all the way at the bottom) 1. Select Enabled and; 2. Click Manage Calls |
 |
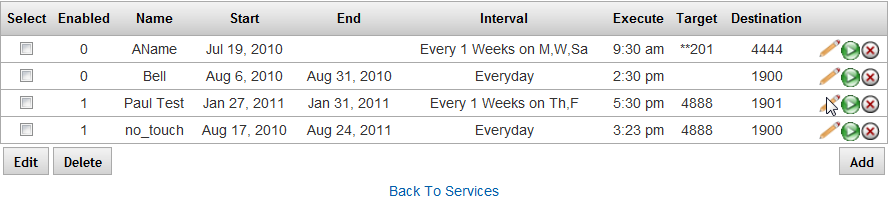
| The Manage Calling Schedule window will open. Either Click "Add" or select an existing Schedule (as is the case in the picture - I am selecting my previously added schedule named Paul Test. |
 |
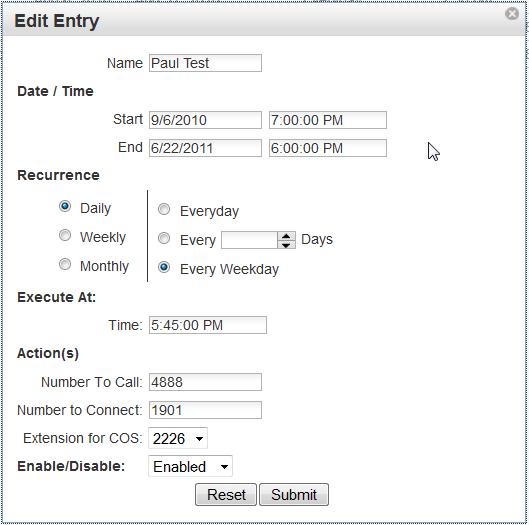
| Now name the Schedule (mine is Paul Test) and select how this schedule will function: Date/Time is the date at which the schedule will become active and conclude (ie. school months as in my example) Recurrence... obviously helpful for repeat operations. Execute at... is when the broadcast will occur. (A scroll bar appears... if one of the general times isn't adequate, just type in the desired time... making sure to keep the format of data required.) In Actions select the Multicast Page that has been set up for this purpose as the Number To Call. Then input the number of the Menu that you created. (In this case it's 1901) Choose a COS (just pick an installed extension for a simple implementation) Select Enabled Click Submit. |
 |
| Don't forget the Save Changes button! PRESS APPLY CHANGES!!! |
This should complete the setup and begin operating during the period of dates you programmed...! |